7 Effective Doctor Office Cleaning Tips for Managers
- jeffwashausen
- Jan 23
- 22 min read

Keeping your medical office truly clean is a daily challenge. Germs can thrive on waiting room chairs, doorknobs, and even in the air, putting both patients and your team at risk. Patients expect a safe environment, but surface-level cleaning is not enough to prevent infections from spreading.
The best practices for cleaning and disinfection in healthcare offices are clear. Following trusted guidelines can make a measurable difference in reducing infection risks and creating a healthier space for everyone. The right approach covers every area where bacteria can linger, from high-touch surfaces to the air you breathe.
You are about to discover the practical steps that top healthcare experts recommend for keeping your office safer and cleaner. Each tip is designed to give you actionable ways to control infections, protect your reputation, and ensure patient confidence. Get ready for clear, proven strategies you can use right away.
Table of Contents
Quick Summary
Takeaway | Explanation |
1. Use Hospital-Grade Disinfectants | Select disinfectants that meet EPA standards to effectively kill pathogens in medical environments, protecting patients and staff. |
2. Clean High-Touch Surfaces Frequently | High-touch surfaces should be cleaned 2-3 times daily to significantly diminish infection risks due to constant patient contact. |
3. Implement Rigorous Hand Hygiene | Ensure staff follow the 5 Moments for Hand Hygiene framework to minimize pathogen spread during patient interactions. |
4. Maintain Air Quality with HEPA Filters | Use HEPA filters to significantly reduce airborne pathogens, protecting patients and staff from invisible risks of infection. |
5. Schedule Daily Trash Removal | Establish routine trash collection to prevent contamination and maintain a sanitary environment that assures patient safety. |
1. Use Hospital-Grade Disinfectants for Common Areas
Waiting rooms, check-in desks, and bathroom handles in your medical office are patient touchpoints where germs thrive. This is where hospital-grade disinfectants become your first line of defense against spreading infections and protecting everyone who walks through your door.
Hospital-grade disinfectants are formulated to eliminate a broad spectrum of pathogens that regular cleaning products cannot handle. The CDC emphasizes that these products are specifically designed to destroy bacteria, viruses, and fungal spores on common surfaces. Unlike standard household cleaners, hospital-grade disinfectants meet strict EPA registration requirements and include tuberculocidal claims that demonstrate their effectiveness in healthcare environments.
Your common areas present unique challenges. Patients sit in waiting chairs, touch magazines and door handles, and cough near the reception desk. These surfaces accumulate microorganisms rapidly, especially during cold and flu season. Standard disinfectants might kill surface germs, but they lack the potency needed in medical settings where immunocompromised patients and those with chronic conditions visit regularly. Hospital-grade products penetrate and eliminate resistant pathogens that could otherwise survive and spread infections.
Implementing this tip requires three practical steps. First, choose EPA-registered disinfectants specifically labeled for healthcare facilities and hospital use. Second, follow the contact time requirements listed on each product’s label—this is the amount of time the disinfectant must remain wet on the surface to be effective. Many managers make the mistake of wiping surfaces too quickly, which undermines the disinfectant’s power. Third, maintain proper concentration by following dilution instructions exactly. Using too little defeats the purpose, while using too much wastes resources and creates safety hazards.
Consider your specific surfaces. Waiting room chairs need different treatment than bathroom countertops. Vinyl upholstery requires products that won’t damage the material, while stainless steel medical equipment needs disinfectants that prevent streaking and corrosion. The APIC recommends that proper use and adherence to disinfectant labels, including contact times and concentration, help ensure effective cleaning of common areas where pathogens can reside and spread.
Your staff needs training too. They must understand that spraying and immediately wiping is ineffective. They need to know which disinfectant works on which surface, how long to let it sit, and how to properly ventilate areas afterward. Many healthcare-associated infections originate from common areas with inadequate disinfection practices. Your team is the difference between a sanitized office and a place where infections spread undetected.
Pro tip: Create a disinfectant application chart posted in each common area showing contact times for different surfaces, ensuring your staff applies each product correctly without guessing or rushing the process.
2. Focus on High-Touch Surfaces for Frequent Cleaning
Your office doorknobs, light switches, and reception desk countertops are bacteria superhighways. Every patient, staff member, and visitor touches these surfaces multiple times daily, making them prime vectors for spreading infections throughout your practice.
High-touch surfaces are the areas in your office that hands contact most frequently. These include doorknobs at the entrance and between exam rooms, light switches, telephone receivers, computer keyboards, credit card machines, bathroom faucet handles, and the check-in counter. In a medical office, these surfaces accumulate pathogens rapidly because your patients often have weakened immune systems, active infections, or contagious conditions. One cough or sneeze deposits respiratory droplets on a doorknob, and the next patient who grasps it can become infected within hours.
The research is clear about frequency. High-touch surfaces require cleaning at least 2-3 times daily in healthcare settings to significantly reduce infection transmission. This is not a once-daily task. Morning cleaning provides only temporary protection. By afternoon, surfaces have accumulated new pathogens from hundreds of interactions. A single cleaning at the end of the day leaves your office vulnerable to cross-contamination overnight and during the next morning’s patient influx.
Implementing a high-touch surface protocol requires establishing a consistent schedule and assigning responsibility. Create a checklist identifying every high-touch surface in your office and assign staff members to clean them at midday and again at the end of the day. Morning cleaning should also occur before your first patient arrives. Use EPA-approved disinfectants with appropriate contact times as discussed in the previous tip. Your bathroom handles and stall locks deserve the same attention as your reception area since patients and staff use these spaces throughout the day.
Consider the specific surfaces in your office layout. Exam room doors get touched before and after every patient encounter. Light switches in bathrooms and hallways accumulate moisture and bacteria. Telephone receivers pressed against faces become contaminated with respiratory secretions. Credit card machines and stylus pens for patient signatures sit idle between uses, accumulating pathogens. Your staff areas also matter. Break room refrigerator handles, microwave buttons, and coffee maker switches deserve disinfection because staff members use them while potentially carrying infections they could spread to patients.
The challenge many managers face is staffing this task without disrupting regular cleaning workflows. Some practices assign these duties to front desk staff during slow periods, while others designate one staff member as the high-touch surface owner for each shift. Rotation prevents burnout and ensures accountability. Quick disinfection takes only minutes per surface when staff members know exactly what needs attention and how to do it efficiently.
Research from the National Centre for Infectious Diseases demonstrates that increased cleaning frequency of high-touch surfaces significantly reduces healthcare-associated infection risk, confirming that this practice directly protects your patients and staff.
Tracking compliance matters more than you might think. Create a simple log where staff initial or sign off after completing their high-touch surface rounds. This documentation proves you maintain infection control standards during regulatory inspections and helps identify any gaps in your cleaning protocol. If you notice that certain surfaces get missed consistently, adjust your checklist or reassign responsibilities.
Pro tip: Equip each staff shift with a dedicated spray bottle of hospital-grade disinfectant and disposable cloths stored near high-touch areas, eliminating the excuse that supplies are not readily accessible and making frequent cleaning a seamless part of your workflow.
3. Adopt Proper Hand Hygiene Protocols for Staff
Your staff members are the primary vehicles for spreading infections in your medical office. Without consistent hand hygiene practices, every touch, examination, and patient interaction becomes a transmission opportunity that undermines all your other cleaning efforts.
Hand hygiene ranks as the single most effective infection control measure in healthcare settings. Your doctors and clinical staff move between exam rooms, handle medical equipment, shake patient hands, and touch their own faces dozens of times daily. A physician who examines one patient with a respiratory infection and then immediately greets another patient without washing hands creates a direct transmission pathway. Receptionists handling patient files and payment methods touch their eyes and mouth without realizing they are transferring pathogens. Dental hygienists and medical assistants working in close proximity with patients must maintain meticulous hand hygiene or risk cross-contamination during every single patient encounter.
The 5 Moments for Hand Hygiene framework provides a practical structure your staff should understand and follow. These moments include washing hands before patient contact, before aseptic procedures, after body fluid exposure risk, after patient contact, and after touching patient surroundings. Rather than asking staff to wash hands randomly throughout the day, this framework creates specific checkpoints where hand hygiene becomes automatic. Your front desk staff wash hands before greeting patients. Your clinical staff wash hands before examining patients, after each patient, and after removing gloves. Your physicians wash hands between seeing patients in exam rooms.
Implementing a successful hand hygiene program requires making it convenient and culturally normal in your office. Stock alcohol-based hand rubs at every treatment station, reception desk, and break room so staff never lack access. Place hand sanitizer dispensers prominently near doorways and patient interaction areas. Train your staff on proper handwashing technique, which includes washing for at least 20 seconds with soap and water, ensuring coverage of palms, backs of hands, between fingers, and under nails. Remind them that alcohol-based hand rubs work well between handwashing but cannot replace soap and water when hands are visibly soiled.
Your leadership sets the tone for compliance. When physicians and office managers visibly practice hand hygiene, staff members follow suit. When you skip handwashing between patients because you are busy, staff notice and develop the same shortcuts. Post reminders in bathrooms and near patient areas, but understand that reminders alone do not change behavior. Multimodal approaches work better. This means combining education, product availability, staff engagement, and monitoring systems. Ask staff during team meetings about barriers to hand hygiene. Perhaps the soap dispenser is broken, or the hand sanitizer runs out frequently. Remove obstacles so compliance becomes the path of least resistance.
Healthcare-associated infections are largely preventable through consistent hand hygiene practices that reduce pathogen transmission, making this the most cost-effective infection control measure available in any medical setting.
Monitor compliance through observation and feedback rather than punishment. Identify staff members who consistently practice excellent hand hygiene and acknowledge their efforts. This creates positive peer pressure and demonstrates that you value this practice. When you observe lapses, provide friendly reminders and additional training rather than criticism. Staff members who understand the why behind hand hygiene protocols tend to maintain them better than those who view them as arbitrary rules.
Different staff positions require tailored approaches. Physicians examining patients need quick access to hand sanitizer between appointments. Clinical staff performing procedures need proper handwashing facilities with foot pedals or sensor activation to maintain sterility. Front desk staff handling payment cards and patient documents need sanitizer within arm’s reach. Create station-specific protocols that acknowledge the different work environments in your office.
Document your hand hygiene program as part of your infection control policy. Track education dates, product inventory, and any compliance monitoring activities. This documentation demonstrates your commitment to infection control during regulatory inspections and provides evidence that you take staff training seriously. When you hire new staff members, hand hygiene training should occur on day one before they interact with patients.
Pro tip: Schedule quick hand hygiene refresher trainings monthly during staff meetings using real patient scenarios from your office, reinforcing the 5 Moments framework and addressing any compliance gaps your staff struggle with.
4. Implement Daily Trash Removal and Disposal Practices
Overflowing trash bins breed bacteria and create biohazard risks in your medical office. Daily trash removal is not a convenience or a nice-to-have practice but rather a fundamental requirement for maintaining a sanitary environment where patients feel confident about their safety.
Trash accumulation in a medical office presents unique hazards compared to other business settings. Your office generates contaminated waste including used examination gloves, tissues from patients with respiratory infections, discarded medical supplies, and sharps containers with needles and lancets. When trash bins remain unemptied throughout the day, bacteria multiply rapidly in warm, moist environments. Odors develop quickly, signaling to patients that your office lacks cleanliness standards. Overflowing containers create spillage risks where contaminated material spills onto floors, furniture, and potentially onto staff members or patients.
Proper waste segregation forms the foundation of effective trash management in medical settings. Waste should be segregated according to type and regular removal prevents overflow and contamination risks within healthcare facilities. Your office should maintain separate containers for general office trash, biohazardous waste, and recyclables. General trash includes regular office materials like paper, cardboard, and food waste from break rooms. Biohazardous waste includes anything contaminated with blood or bodily fluids, used gloves, contaminated bandages, and sharps. Recyclables include clean paper and cardboard that do not contact patient materials. Clearly labeling each container prevents cross contamination and ensures staff members dispose of materials correctly.
Implementing daily removal practices requires establishing a routine that fits your office workflow. Many practices empty trash bins at midday and again at the end of the business day. This prevents overflow during busy patient schedules when trash accumulates rapidly. Your clinical staff areas generate more biohazardous waste than administrative areas, so consider emptying treatment room and bathroom trash more frequently than break room trash. A morning trash removal before your first patient arrives ensures your office starts the day clean and fresh.
Designate specific staff members responsible for trash removal at consistent times daily. Create a simple checklist identifying all trash containers throughout your office, including the bathroom, break room, each exam room, the reception area, and any staff work areas. Responsibility without accountability leads to inconsistency, so document when trash was removed and by whom. If you notice containers being missed repeatedly, reassign duties or adjust the removal schedule.
Sharp containers require special attention in your medical office. Needles, lancets, and other sharps present puncture wound risks to staff members during trash handling. Keep sharps containers in treatment areas where staff use needles frequently. Never place sharps in regular trash containers. When a sharps container reaches three quarters full, it should be sealed and replaced with a fresh container. Your biohazard waste service provider will collect and properly dispose of sealed sharps containers according to EPA regulations.
Train your entire staff on proper trash handling procedures. They should understand which materials belong in which containers, how to safely dispose of sharps without creating spillage or puncture risks, and the importance of not overfilling containers. Staff members who understand the hygiene and safety rationale behind daily trash removal tend to maintain the practice more consistently than those who view it as an arbitrary task.
Your office environment sends powerful signals to patients about your commitment to cleanliness and safety. A patient sitting in your waiting room noticing an overflowing trash bin questions your infection control practices and facility maintenance standards. That patient may choose to seek care elsewhere or leave negative reviews about your office. Conversely, an impeccably maintained office with empty trash bins, clean floors, and organized spaces reassures patients that they are in a professional, safe healthcare environment.
Pro tip: Schedule automated reminders on staff phones for midday and end of day trash removal times, and assign rotating responsibility so no single staff member burns out while others avoid the task.
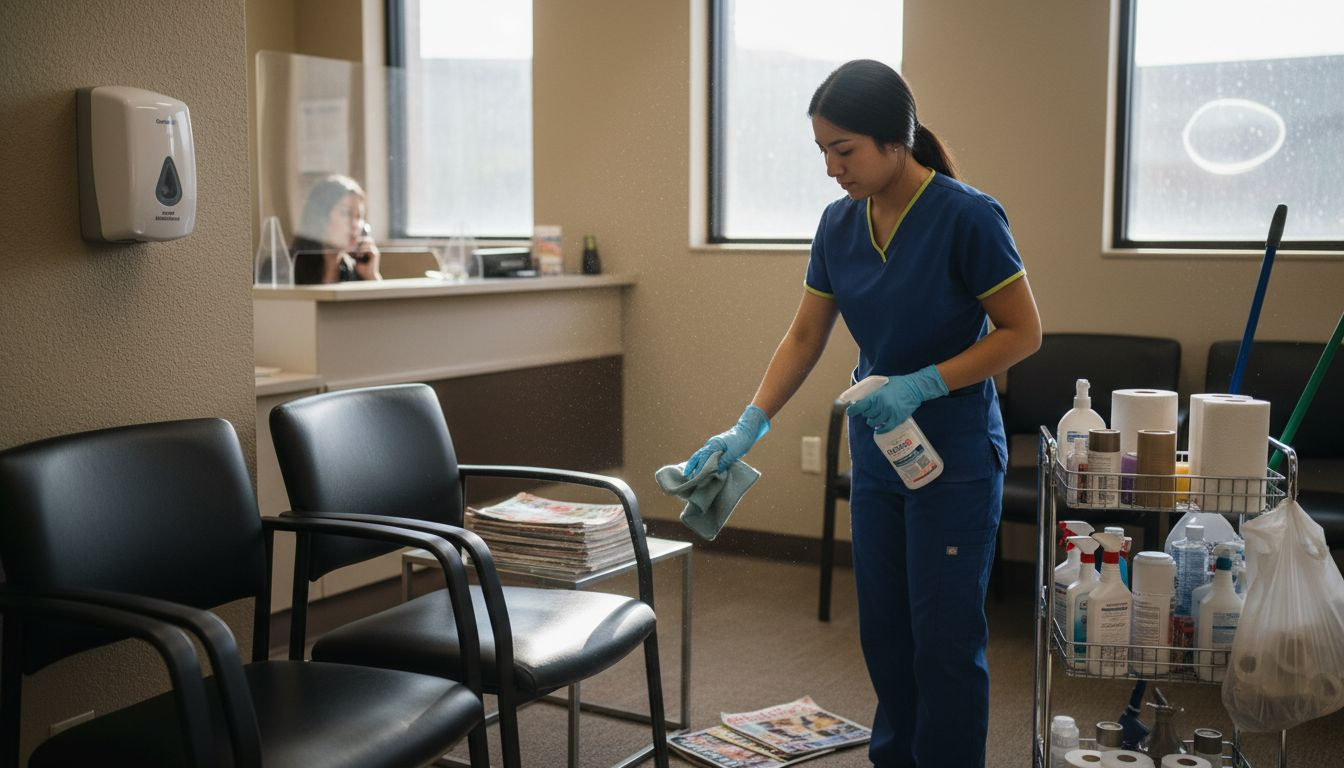
5. Sanitize Waiting Rooms and Patient Seating Regularly
Your waiting room is where sick patients congregate before seeing your doctors. Chair armrests get gripped by hundreds of hands monthly, magazines get passed between coughing patients, and every surface becomes a pathogen repository if not sanitized regularly.
Waiting rooms present a unique infection control challenge because they concentrate vulnerable populations. Patients visit your office when they are ill, experiencing flu symptoms, respiratory infections, or other contagious conditions. They sit in close proximity for 15 to 30 minutes before being called back for their appointments. A patient with the flu sits in a chair, coughs into their hands, then grabs the armrest. The next patient sits in that same chair and grips that contaminated armrest, transferring pathogens directly to their skin. Within hours, that second patient may develop symptoms from an infection acquired in your waiting room.
Chair armrests and seat surfaces require frequent attention because they receive constant direct contact. Patients rest their bare arms on armrests while waiting. They shift in their seats, their clothing rubbing against fabric. If your chairs have upholstered seating, bacteria and viruses embed themselves in the fabric fibers where they can survive for hours or even days. Regular cleaning and disinfection of waiting rooms and patient seating areas reduces transmission of infectious agents using EPA-registered disinfectants with demonstrated efficacy against healthcare-associated pathogens.
Magazines and reading materials in your waiting area present a frequently overlooked contamination source. Patients flip through magazines while waiting, their hands transferring pathogens to every page. The next patient picks up that same magazine and handles the contaminated pages. Unlike chairs that can be disinfected, magazines cannot be easily sanitized without damaging them. Consider rotating magazines weekly and discarding those showing wear or visible soiling. Better yet, eliminate paper magazines altogether and replace them with digital displays or tablets that can be easily disinfected between uses.
Implementing a waiting room sanitization schedule requires identifying all high-contact surfaces and establishing cleaning frequencies. Your checklist should include chair armrests, seat cushions, the reception counter where patients sign in, door handles leading to exam rooms, table surfaces, light switches, and any other surfaces patients touch during their waiting period. Clean these surfaces at minimum once daily, preferably at midday and at the end of the business day. During high-traffic periods or during respiratory illness seasons, increase frequency to every two to three hours.
Your choice of disinfectant matters significantly. Use EPA-registered hospital-grade disinfectants appropriate for the surface material. Upholstered chairs require disinfectants that work on fabric and do not leave damaging residues. Hard surfaces like plastic chairs and metal-framed seating tolerate more aggressive disinfectants. Always follow the manufacturer’s contact time requirements. Spraying a surface and immediately wiping it dry defeats the purpose because the disinfectant needs time to kill pathogens. Many staff members make this mistake, thinking they are cleaning when they are actually just removing visible dirt without eliminating invisible pathogens.
Consider replacing traditional waiting room seating with plastic or vinyl chairs that withstand frequent disinfection. These materials do not absorb liquids and pathogens cannot embed in the fibers like they do in upholstered furniture. While the initial investment exceeds traditional seating, the long term maintenance and infection control benefits often justify the expense. Plastic chairs can be thoroughly disinfected multiple times daily without degradation.
Your waiting room cleanliness directly impacts patient perception and satisfaction. Patients notice when chairs look dirty or smell stale. They observe whether your staff wipes down surfaces throughout the day. A clean, fresh waiting room signals that you maintain high cleanliness standards throughout your entire office. Conversely, a waiting room with visible dirt, worn seating, or cluttered surfaces creates doubt about your infection control practices and overall professionalism. Patients make judgments about your competence based on environmental cleanliness within the first 30 seconds of entering your practice.
Patient comfort and safety depend directly on maintaining impeccably clean waiting areas where vulnerable populations spend time before receiving medical care.
Train your staff on proper waiting room sanitization procedures. They should know which disinfectant works on which surfaces, how long contact time is required, and the importance of not rushing the process. Assign specific staff members responsibility for waiting room maintenance at designated times throughout the day. Document these cleaning activities as part of your infection control documentation.
Pro tip: Place a disinfectant wipe dispenser in your waiting room and encourage patients to wipe down chair armrests before sitting, creating shared responsibility for cleanliness while reinforcing your commitment to sanitation.
6. Schedule Routine Deep Cleaning for Exam Rooms
Exam rooms are where your doctors touch patients directly, conduct physical examinations, and use medical equipment that contacts skin and mucous membranes. Without routine deep cleaning between every patient, your exam rooms become contamination zones where infections transfer from one patient to the next.
Exam rooms present cleaning challenges that other office areas do not face. Patients sit on exam tables, place their hands on armrests, and sometimes cough or sneeze directly onto surfaces. Your physicians and clinical staff touch patients and then immediately touch door handles, light switches, and equipment without changing gloves between interactions. An exam table used by a patient with a skin infection may harbor bacteria that survive for hours. That same table used by the next patient without proper disinfection risks transmitting that infection. Blood, saliva, and other bodily fluids occasionally contact exam room surfaces, creating biohazard situations that require thorough decontamination.
Routine deep cleaning for exam rooms after each patient encounter ensures surfaces are cleaned with detergent and disinfected with EPA-registered products ensuring appropriate contact time to eliminate pathogens. This is not a quick wipe down between patients but rather a thorough decontamination protocol that removes organic material and kills microorganisms on all surfaces the patient contacted.
Your exam room cleaning protocol should begin with removing organic material. If blood or other bodily fluids are visible, use absorbent material to remove the bulk of organic matter before disinfection. Disinfectants cannot effectively kill pathogens if organic material coats surfaces. Once organic material is removed, apply hospital-grade disinfectant to all high-touch surfaces including the exam table, armrests, light switches, door handles, and any equipment the patient contacted. Allow adequate contact time as specified on the disinfectant label. Many staff members cut this time short, assuming the disinfectant works instantly. In reality, most EPA-registered disinfectants require 30 seconds to several minutes of wet contact time to effectively eliminate pathogens. Rushing this step undermines the entire cleaning process.
Your exam tables deserve particular attention because they contact patient skin directly. If your tables have fabric covering, consider replacing them with vinyl or plastic surfaces that withstand frequent disinfection without degradation. Fabric-covered tables absorb pathogens and body fluids that cannot be easily removed through surface disinfection. After disinfecting the table surface, wipe it dry with clean paper towels to prevent moisture accumulation that allows bacteria to multiply.
Developing an exam room cleaning checklist ensures your staff does not miss critical surfaces. Your checklist should include the exam table, paper roll holder, arm supports, backrests, light switches, door handles, sink faucet handles, counter surfaces, waste receptacles, and any reusable patient care equipment used during the encounter. Assign specific staff members responsibility for exam room cleaning between patients. Some offices rotate this responsibility, while others designate one staff member as the exam room cleaner during each shift. Whichever approach you choose, accountability matters. Document when each exam room was cleaned and by whom to demonstrate your commitment to infection control during regulatory inspections.
Timing is critical for your exam room protocol. Your clinical schedule likely has transition time between patient appointments. Use this time strategically for thorough exam room cleaning. If your schedule leaves only five minutes between patients, you lack sufficient time for proper deep cleaning. Consider adding five to ten minute buffers between appointments specifically designated for exam room decontamination. This protects both your patients and your staff while maintaining compliance with infection control standards. Your patients benefit from knowing that each exam room is thoroughly cleaned before they enter. Your staff members appreciate not feeling rushed through cleaning duties that directly impact patient safety.
Reusable patient care equipment requires special attention in your deep cleaning protocol. If you use blood pressure cuffs, pulse oximetry probes, thermometers, or other equipment on multiple patients, clean and disinfect these items between uses. Equipment that contacts patient skin should be disinfected after every patient. Equipment like stethoscopes that contact patient skin and your ears should be wiped down frequently. If you use electronic thermometers, disinfect the probe after each use. Many healthcare-associated infections originate from contaminated reusable equipment that did not receive proper decontamination between patients.
Train your entire clinical staff on your exam room cleaning protocol. They should understand why deep cleaning matters, which surfaces require attention, what disinfectant to use on which surfaces, and the importance of contact time. Staff members who understand the reasoning behind your protocol tend to maintain it consistently rather than cutting corners when busy. Provide written instructions posted in each exam room so staff can reference proper procedures without guessing.
Thorough decontamination of exam rooms between patients is the foundation of infection control in medical offices, preventing cross-contamination and protecting both patients and staff from healthcare-associated infections.
Monitor compliance through observation and periodic audits. Watch your staff during cleaning to ensure they are following your protocol completely. If you notice shortcuts being taken, address them immediately with additional training rather than allowing the behavior to persist.
Pro tip: Create a simple laminated checklist posted in each exam room that staff sign or initial after completing cleaning, making accountability visible and reminding staff members of every surface requiring attention.
7. Check and Maintain Air Quality with HEPA Filters
While you focus on disinfecting surfaces and sanitizing equipment, airborne pathogens float freely through your office undetected. Every cough, sneeze, and breath releases viral and bacterial particles into the air that patients and staff inhale. HEPA filtration is your invisible defense against airborne transmission that surface cleaning alone cannot address.
Airborne transmission became a critical concern in modern medicine, especially during respiratory illness outbreaks. A patient sitting in your exam room coughs, releasing thousands of respiratory droplets and aerosol particles into the air. These particles remain suspended for hours in poorly ventilated spaces. The next patient entering that same room inhales these particles, potentially acquiring the infection. Your staff members working in these spaces all day face cumulative exposure risk. Standard HVAC filters trap only large particles while allowing smaller pathogenic particles to circulate freely throughout your office. This is where HEPA filters make a measurable difference.
HEPA filters capture 99.97% of airborne particles down to 0.3 microns, including dust, pollen, mold spores, bacteria, and viruses. This efficiency level far exceeds standard filters. A particle that passes through a standard filter gets trapped by a HEPA filter. Over time, this difference compounds significantly. Your staff members and patients breathe cleaner air. Infection transmission through respiratory routes decreases measurably. While HEPA filters cannot eliminate all airborne pathogens, they substantially reduce the viral and bacterial load in your office environment.
Upgrading your HVAC system to accommodate HEPA filtration requires assessing your current system capabilities. ASHRAE recommends using HVAC filters with a Minimum Efficiency Reporting Value (MERV) of 13 or higher to improve indoor air quality. HEPA filters exceed these standards. However, not all HVAC systems can support HEPA filters without modifications. Older systems designed for lower resistance filters may experience reduced airflow if you install high efficiency filters. Consult with an HVAC professional to evaluate your system. They can determine whether you can upgrade to HEPA filters directly or whether you need system modifications first.
If your existing HVAC system cannot accommodate HEPA filtration, portable HEPA air cleaners offer an effective alternative. These units sit in treatment areas and offices, actively pulling contaminated air through HEPA filters and releasing cleaned air back into the space. Place portable HEPA units in high risk areas like exam rooms where patients with respiratory infections receive care. Position them to maximize air circulation throughout the room. While less comprehensive than whole-building HEPA filtration, portable units provide targeted protection in specific areas where airborne transmission risk is highest.
Maintenance of HEPA filters is critical for maintaining their effectiveness. HEPA filters accumulate trapped particles over time. When they become saturated with particles, airflow decreases and filtration efficiency drops. Follow the manufacturer’s recommendations for filter replacement, typically every 6 to 12 months depending on usage and air quality. Create a maintenance schedule and document when filters were replaced. This documentation demonstrates your commitment to air quality during regulatory inspections. Assign a staff member responsibility for monitoring filter status and scheduling replacements before filters become completely saturated.
Consider the full scope of your ventilation system, not just filters. Adequate air exchange rates matter as much as filter efficiency. Your office should have sufficient ventilation to completely change the air in each room multiple times per hour. During high patient volume periods, even excellent filters cannot remove all pathogens if air is not being exchanged frequently enough. If your office has poor ventilation design, upgrading filters alone may not solve airborne transmission risks. Work with an HVAC professional to evaluate and improve your overall ventilation system design.
Patient and staff perception matters for your air quality initiatives. When patients know your office prioritizes airborne pathogen filtration, they feel safer. Staff members working in well ventilated spaces with quality air filtration appreciate the workplace safety investment. Communicate your air quality measures to both groups. Post signage indicating HEPA filtration in use. Mention air quality improvements during patient interactions. This builds confidence in your infection control practices beyond what they can visually observe.
Protecting indoor air quality through HEPA filtration or upgraded HVAC filters represents a comprehensive approach to infection control that addresses transmission routes surface cleaning cannot reach.
Your investment in air quality reflects your commitment to patient and staff safety. Respiratory infections represent significant health risks in medical office settings where vulnerable patients congregate. By reducing airborne pathogenic load through quality filtration, you decrease transmission likelihood and protect everyone who works in and visits your office. This investment often pays dividends through reduced infection rates, improved employee health, and enhanced patient satisfaction.
Pro tip: Schedule HEPA filter replacement on a calendar reminder system and document each replacement in your infection control logs, ensuring consistent maintenance and creating accountability for this critical air quality measure.
Below is a comprehensive table summarizing the best practices for maintaining cleanliness and safety in medical office environments as detailed in the article.
Practice | Implementation Steps | Benefits |
Use Hospital-Grade Disinfectants | Select EPA-registered products, adhere to contact times, and train staff in proper usage. | Eliminates a wide range of pathogens effectively and protects vulnerable individuals. |
Focus on High-Touch Surfaces | Create a cleaning schedule for frequent touchpoints, use proper disinfectants, and track compliance. | Reduces bacterial load on frequently used surfaces, minimizing cross-contamination. |
Adopt Proper Hand Hygiene Protocols | Train staff on the 5 Moments framework, ensure availability of sanitizers, and set an example. | Prevents person-to-person pathogen transmission, the most significant safeguard in infection control. |
Implement Daily Trash Removal | Establish routines for timely removal of regular and biohazard waste, emphasizing segregation. | Prevents bacterial growth and odor while maintaining compliance with environmental health standards. |
Sanitize Waiting Rooms Regularly | Increase the frequency of cleaning high-touch areas and ensure staff accountability. | Enhances patient trust and limits the spread of infectious agents in communal areas. |
Schedule Deep Cleaning for Exam Rooms | Clean all patient-contact surfaces between encounters and replace worn furnishings. | Delivers a consistently sanitized environment, ensuring patient safety and meeting regulatory standards. |
Maintain Air Quality with HEPA Filters | Install HEPA systems or portable units and schedule regular maintenance of filters. | Protects against airborne pathogens, particularly respiratory ones, boosting overall medical office health standards. |
Protect Your Medical Office with Expert Cleaning Solutions
Managing a medical office means facing the challenge of maintaining a pristine, germ-free environment to protect patients and staff from harmful pathogens. The article highlights critical issues such as high-touch surface sanitation, hospital-grade disinfectants, and proper air quality management that demand professional care and consistent execution. You want to stop infections before they start and create a safe space where every patient feels confident in your commitment to their health.
Don’t leave your infection control to chance. Trust Lemon Maids for specialized commercial cleaning services that deliver thorough deep cleaning, effective sanitization of high-touch areas, and even advanced air quality solutions tailored to healthcare settings. Our expert team understands the nuances of medical office cleaning protocols and helps you maintain compliance with rigorous hygiene standards. Take the step to safeguard your practice today by visiting Lemon Maids and discover how professional cleaning elevates patient care and staff safety.
Frequently Asked Questions
How often should I disinfect common areas in a doctor’s office?
To effectively reduce the risk of infection, common areas should be disinfected at least 2-3 times daily. Implement a cleaning schedule that includes disinfection before the first patient arrives, midday, and at the end of the day to maintain a safe environment.
What surfaces should be prioritized for cleaning in a medical office?
Focus on high-touch surfaces such as doorknobs, light switches, and reception counters, which should be cleaned frequently throughout the day. Create a checklist to ensure these areas are addressed at least every couple of hours during busy periods.
What are the best practices for hand hygiene in a doctor’s office?
Staff members should wash their hands before patient contact, after patient interactions, and after handling any potentially contaminated materials. Train your team on proper handwashing techniques and ensure hand sanitizers are readily available at every workstation.
How can I ensure my exam rooms are thoroughly cleaned between patients?
Establish a detailed cleaning protocol that involves removing organic material first, followed by thorough disinfection of surfaces with EPA-registered products. Schedule adequate time between appointments to ensure each exam room is properly deep cleaned after every patient encounter.
Why is air quality important in a medical office setting?
Maintaining good air quality reduces airborne transmission of pathogens, protecting both patients and staff. Use HEPA filters to enhance air filtration and schedule regular maintenance to replace filters as needed, ideally every 6-12 months.
How can I track compliance with cleaning protocols in my office?
Create checklists for daily cleaning tasks and implement a log where staff members initial or sign off after completing their rounds. This documentation helps ensure accountability and can be reviewed during inspections to confirm adherence to infection control standards.
Recommended
Comments